安装JDK
Jetpack一般不带JDK,sudo apt install openjdk-11-jdk 装一个。
安装Bazel
针对Mediapipe这个项目,你需要使用的Bazel版本,取决于你下载的Mediapipe版本所使用的Bazel版本(有点绕,高可以,低不行)。
要问CMake能不能编,肯定能编,但重写CMakeLists的工作量非常大。况且Mediapipe作为一个Google的开源项目,使用自家的Bazel非常合理,对吧。
Mediapipe根目录中的 version.bzl文件中注明了当前项目的版本,我是 MEDIAPIPE_FULL_VERSION = "0.10.13"
在 .bazelversion文件中注明里此Mediapipe使用的Bazel版本:6.1.1
Bazel的下载链接为 Bazel Release 如果是x86架构,可以选择使用 .sh脚本安装,但是发现没有Jetson的ARM架构的,因此使用源码安装。即 bazel-6.1.1-dist.zip这个文件,下载之。下载完了 unzip解压之。没有 unzip自已装一个。
解压完成后运行 compile.sh脚本,等待安装完成。
安装完成后修改 ~/.bashrc,加入 export PATH=/home/jetson/Documents/Bazel/output:$PATH
然后 source ~/.bashrc,在Terminal中输入 bazel会有一个短暂的初始化过程。之后会显示
jetson@ubuntu:~$ bazel
WARNING: Invoking Bazel in batch mode since it is not invoked from within a workspace (below a directory having a WORKSPACE file).
                                               [bazel release 6.1.1- (@non-git)]
那个 @non-git不用管他,因为我们是源码编译的。自此Bazel安装完成。
编译Mediapipe
先修改OpenCV和FFMPEG的路径,需要修改的文件为1. WORKSPACE 2.third_party中的 opencv_linux.BUILD两个文件中:
- WORKSPACE: path改成你的OpenCV路径
new_local_repository(
    name = "linux_opencv",
    build_file = "@//third_party:opencv_linux.BUILD",
    path = "/usr/local",
)

new_local_repository(
    name = "linux_ffmpeg",
    build_file = "@//third_party:ffmpeg_linux.BUILD",
    path = "/usr/bin"
)
- opencv_linux.BUILD:取消注释对应的那几行
cc_library(
    name = "opencv",
    hdrs = glob([
        # For OpenCV 4.x
        "include/aarch64-linux-gnu/opencv4/opencv2/cvconfig.h",
        #"include/arm-linux-gnueabihf/opencv4/opencv2/cvconfig.h",
        #"include/x86_64-linux-gnu/opencv4/opencv2/cvconfig.h",
        "include/opencv4/opencv2/**/*.h*",
    ]),
    includes = [
        # For OpenCV 4.x
        "include/aarch64-linux-gnu/opencv4/",
        #"include/arm-linux-gnueabihf/opencv4/",
        #"include/x86_64-linux-gnu/opencv4/",
        "include/opencv4/",
    ],
    linkopts = [
        "-l:libopencv_core.so",
        "-l:libopencv_calib3d.so",
        "-l:libopencv_features2d.so",
        "-l:libopencv_highgui.so",
        "-l:libopencv_imgcodecs.so",
        "-l:libopencv_imgproc.so",
        "-l:libopencv_video.so",
        "-l:libopencv_videoio.so",
    ],
    visibility = ["//visibility:public"],
)
然后根据上述链接中的命令,先编个Hello World出来,这个编译的快,可以快速验证你的Bazel和gcc编译器有无问题。
我当然遇到问题了,见下面TroubleShooting部分。
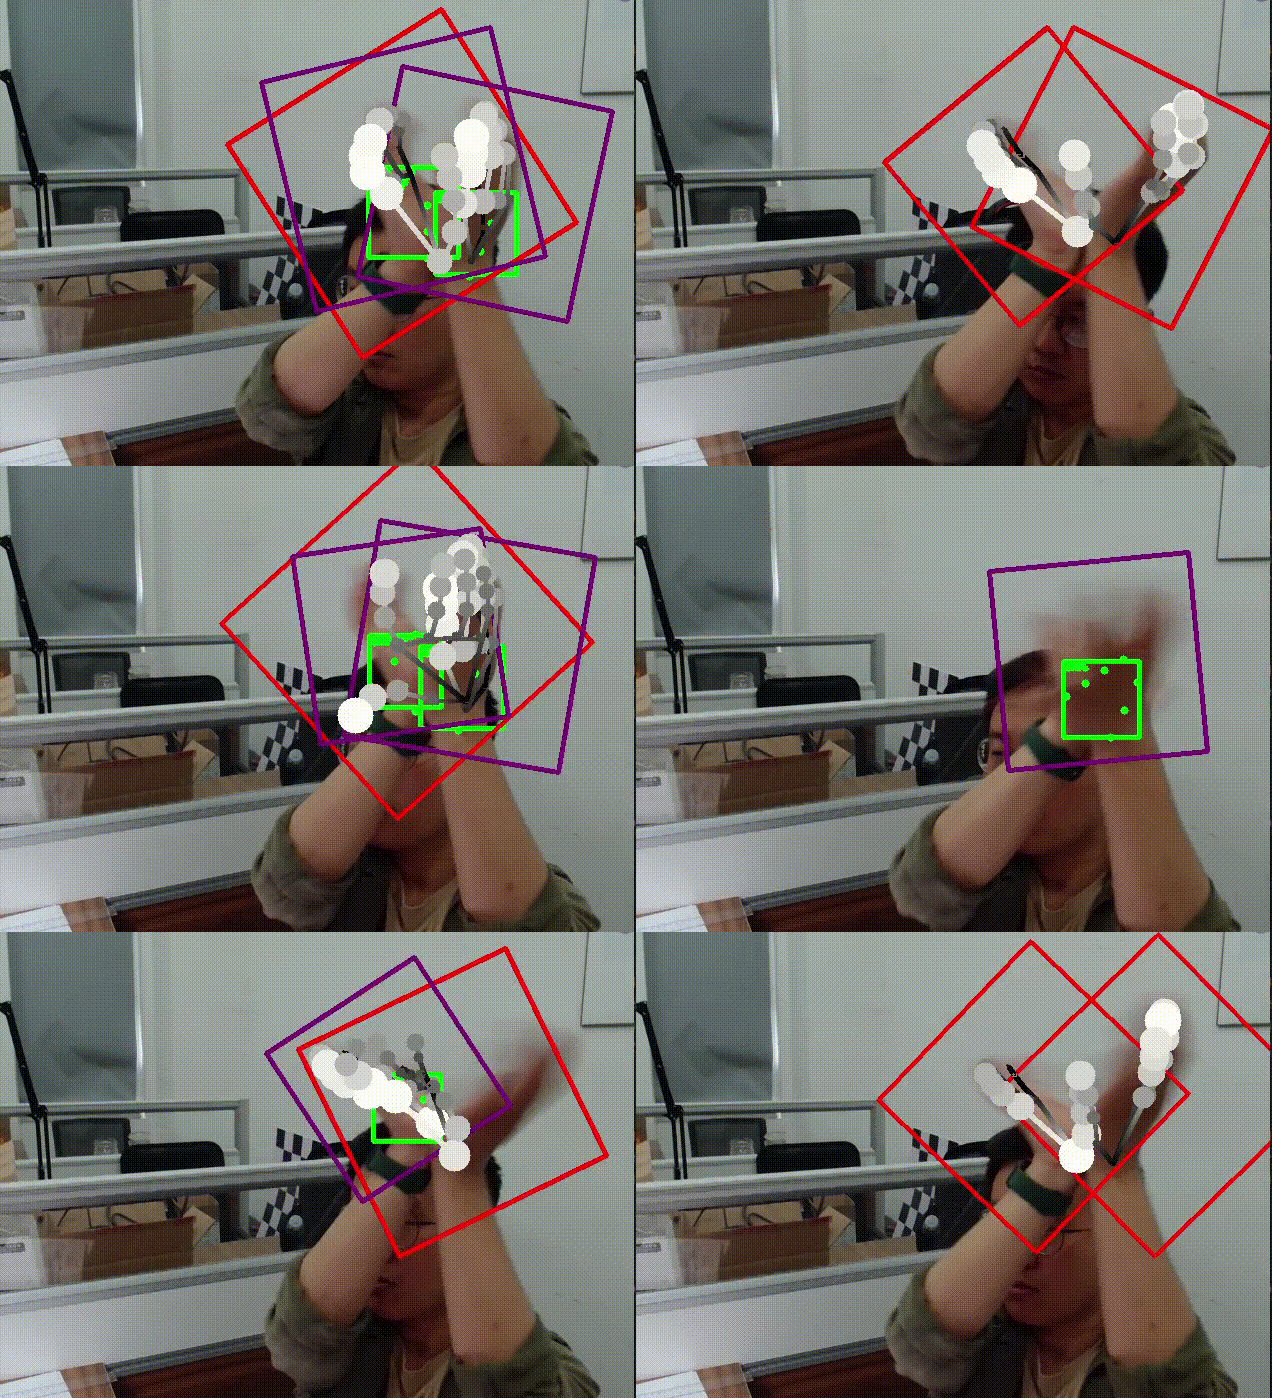
随后编译 Hand Detection 功能,编译之前先把 mediapipe\examples\desktop\demo_run_graph_main_gpu.cc路径中OpenCV的 VideoCapture所使用的相机路径改好。
- CPU版本:
编译 bazel build -c opt --define MEDIAPIPE_DISABLE_GPU=1 mediapipe/examples/desktop/hand_tracking:hand_tracking_cpu
运行 GLOG_logtostderr=1 bazel-bin/mediapipe/examples/desktop/hand_tracking/hand_tracking_cpu \ --calculator_graph_config_file=mediapipe/graphs/hand_tracking/hand_tracking_desktop_live.pbtxt
- GPU版本:
编译:bazel build -c opt --copt -DMESA_EGL_NO_X11_HEADERS --copt -DEGL_NO_X11 \ mediapipe/examples/desktop/hand_tracking:hand_tracking_gpu
运行:GLOG_logtostderr=1 bazel-bin/mediapipe/examples/desktop/hand_tracking/hand_tracking_gpu \ --calculator_graph_config_file=mediapipe/graphs/hand_tracking/hand_tracking_desktop_live_gpu.pbtxt
运行效果:

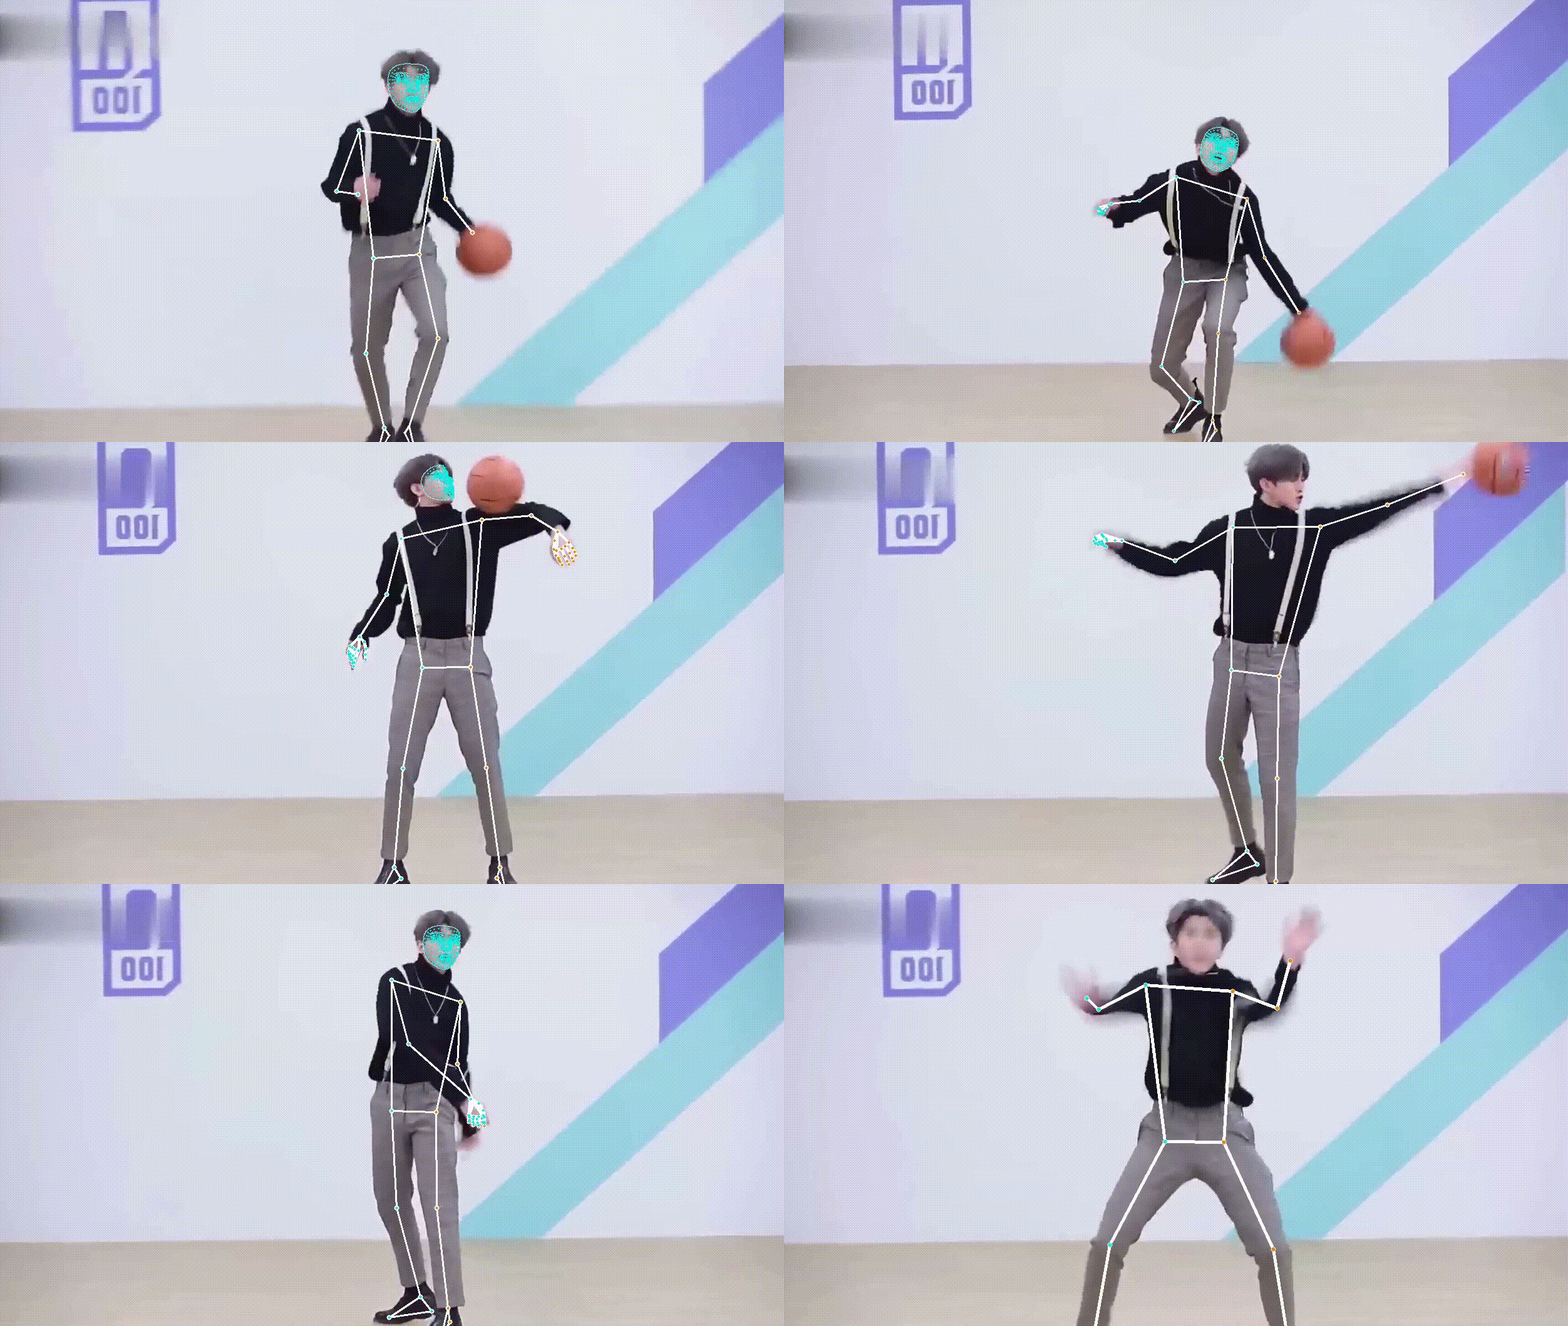
然后可以编译GPU版的 Holistic 检测,命令:
bazel build -c opt --copt -DMESA_EGL_NO_X11_HEADERS --copt -DEGL_NO_X11 mediapipe/examples/desktop/holistic_tracking:holistic_tracking_gpu
编译选项中是否加入CUDA似乎不重要,根据Github中的一个Issue,CUDA只用于Object Detection,
运行:GLOG_logtostderr=1 bazel-bin/mediapipe/examples/desktop/holistic_tracking/holistic_tracking_gpu --calculator_graph_config_file=mediapipe/graphs/holistic_tracking/holistic_tracking_gpu.pbtxt
运行效果:

TroubleShooting
- 报错包含
(Exit 1): gcc failed:
比如我遇到的 ERROR: /home/funnywii/.cache/bazel/_bazel_funnywii/4274885c1bcb543952ac607fcb912a97/external/XNNPACK/BUILD.bazel:2613:19: Compiling src/amalgam/gen/avx512amx.c failed: (Exit 1): gcc failed: error executing command (from target @XNNPACK//:avx512amx_prod_microkernels) /usr/bin/gcc -U_FORTIFY_SOURCE -fstack-protector -Wall -Wunused-but-set-parameter -Wno-free-nonheap-object -fno-omit-frame-pointer -MD -MF ... (remaining 41 arguments skipped)
一大串,关键在于 gcc failed,是因为 gcc版本不够,Ubuntu20自带的是9.4.0还是低,这也是离谱。
sudo apt-get install gcc-10 g++-10
先删除 /usr/bin的 g++和 gcc软连接:
sudo rm g++
sudo rm gcc
随后修改g++和gcc的软连接,指向10版本的。
sudo ln -s g++-10 g++
sudo ln -s gcc-10 gcc
使用 ls -l g++和 ls -l gcc查看修改结果
lrwxrwxrwx 1 root root 6 Apr 28 11:33 g++ -> g++-10
lrwxrwxrwx 1 root root 6 Apr 28 11:32 gcc -> gcc-10
- 找不到
'/usr/lib/gcc/x86_64-linux-gnu/9/include/stddef.h' '/usr/lib/gcc/x86_64-linux-gnu/9/include/stdarg.h' '/usr/lib/gcc/x86_64-linux-gnu/9/include/stdint.h'
具体报错 this rule is missing dependency declarations for the following files included by 'src/raw_logging.cc': '/usr/lib/gcc/x86_64-linux-gnu/9/include/stddef.h' '/usr/lib/gcc/x86_64-linux-gnu/9/include/stdarg.h' '/usr/lib/gcc/x86_64-linux-gnu/9/include/stdint.h'
先前gcc-9编译的文件还在,需要清理bazel工作环境,使用 bazel clean --expunge,然后重新编译。
- 找不到
face_detection_short_range
具体报错为 Can't find file: mediapipe/modules/face_detection/face_detection_short_range.tflite
似乎最新版本的项目漏掉了这个文件...Here 下载Face Det的Short-range model 即可。文件名为 face_detection_short_range.tflite,放在目录 /mediapipe/mediapipe/modules/face_detection下。
将Mediapipe编译为库
Python版本的可能还好些,只需要导入mediapipe库即可使用,方便后续修改为ROS或者使用其他通信方式。但是 C++ 版本使用Bazel编译,因此修改为基于CMake和Catkin的ROS会比较困难。因此若想要把检测的结果API暴露出来,最好是通过编译为库的方式,在外部C++程序中调用Mediapipe库并使用它的检测结果。
这部分工作我暂时还没开始做,先贴几个参考链接:
编译为WindowsDLL库
编译为Ubuntu上的QT
编译为MacOS的SO库
可以参照上述几个链接,做一下库的编译工作。后面我腾出手来会单独写一篇Ubuntu的so库编译的Blog。
