
记录自己常用的软件和环境在新Ubuntu系统下的配置。
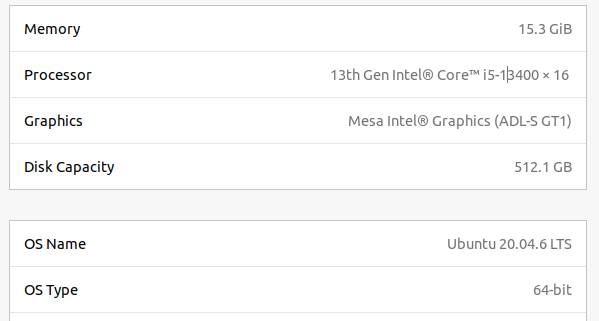
系统环境:
软件安装
Clash
迷信上网必备。
首先下载软件 https://github.com/Dreamacro/clash/releases ,我下载的是 clash-linux-amd64-v1.14.0.gz https://github.com/Dreamacro/clash/releases/download/v1.14.0/clash-linux-amd64-v1.14.0.gz
之后在/home下面创建一个clash文件夹,并将下载的文件解压至此,改名为clash。
在新文件夹内打开terminal, 修改软件权限:
chmod +x clash
下载配置链接和country.mmdb文件:
wget -O config.yaml "clash的订阅链接" (链接要带双引号)
wget -O Country.mmdb https://www.sub-speeder.com/client-download/Country.mmdb
不过非常遗憾的是,个人比较苦逼,这两个东西都下载不下来,所以就用另一台电脑里现成的…
这两个命令会在clash文件夹中生成两个文件config.yaml和Country.mmdb。
之后,修改系统代理:
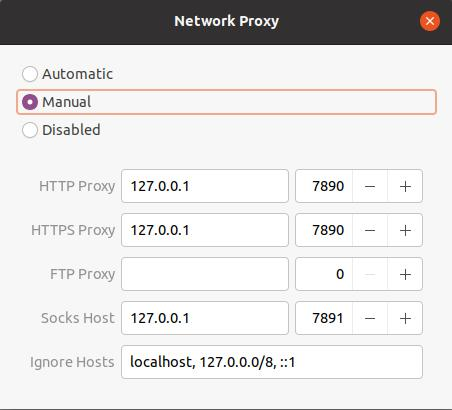
仍然是在这个文件夹中的terminal,运行./clash -d .即可启动clash。不要忘了最后那个.
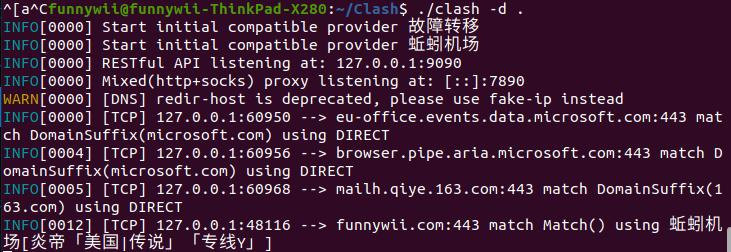
在 http://clash.razord.top/#/proxies 这个dashboard中可以修改节点。
挖坑:过阵子会研究一下使用脚本开机自启clash
VS code
下载地址 https://code.visualstudio.com/
Ubuntu Software里也有VS code。两者在功能上没有差异,但是商店版的不能输入中文,虽然写代码过程中几乎没有输入中文的需求,但是考虑到有些代码不得不用中文注释,所以建议还是下载官网版。
在官网,Ubuntu系统 选择.deb版本。
cd至安装包下载路径,运行命令sudo dpkg -i code_1.77.3-1681292746_amd64.deb
注意每个版本的文件名不一样。
安装完成后,可以打开VS code

MATLAB
我用的是教育版,https://www.mathworks.com/downloads/ 直接下载Linux最新版。
下载的是一个压缩文件,解压,在解压后的文件目录运行./install
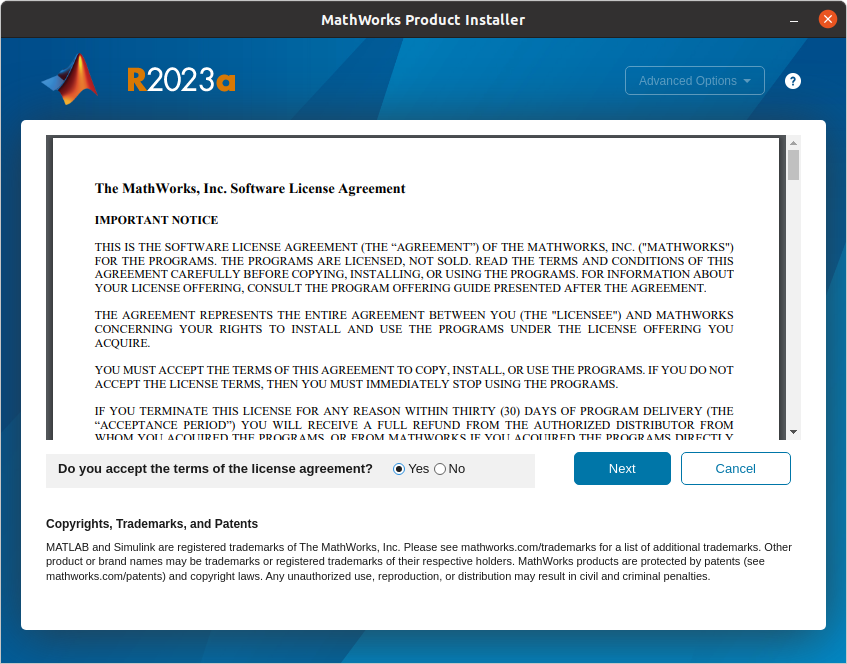
一直next,并安装自己需要的package,直到结束即可。
WPS
https://www.wps.cn/product/wpslinux
CLion & PyCharm
官网下载连接
https://www.jetbrains.com/pycharm/download/#section=linux
https://www.jetbrains.com/clion/download/#section=linux
下载解压后,在相应的bin文件夹用运行相应的.sh脚本即可运行。
不过有点麻烦,我选择下载商店版本。
Onedrive
使用的是onedriver
sudo add-apt-repository ppa:jstaf/onedriver
sudo apt update
sudo apt install onedriver
安装后,在菜单中搜索 OneDriver,然后从这里启动它。

点击下图的 + 号,选择一个文件夹或创建一个新的文件夹,OneDrive 会挂载在那里。
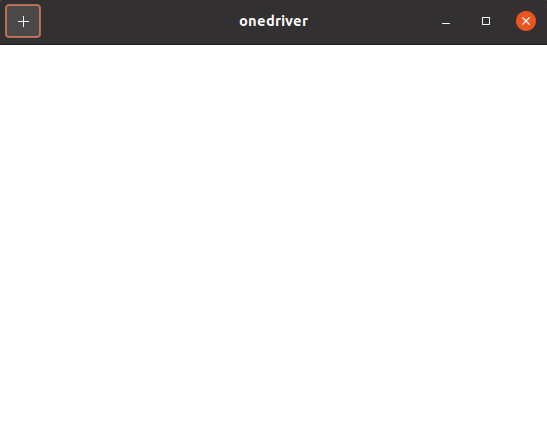
在之后弹出的微软登陆页面中登陆,便会挂载成功。挂载成功后,在上图页面会有一个对号,点击他,每次启动系统会自动挂载Onedrive
本来打算用wine,但是想到经历过的很多遭心事,遂换星火
http://www.spark-app.store/download
注意Ubuntu 20.04版本需要先安装依赖,解压依赖包后,在依赖文件夹运行
sudo apt install ./*.deb -y
之后再输入(官方建议不要使用 dpgk -i 命令,会导致安装失败)
sudo apt install ./spark-store_4.2.5_amd64.deb
安装完成后,运行
apt install update
即可下载微信。体验了一下,仍然不能esc退出,或者保存wx在后台。所以说不准哪天就换回wine了。
笔记软件 Joplin
我用的Joplin,支持markdown和多平台同步。
下载地址:
https://joplinapp.org/help/#desktop-applications
万恶的dingding
官网下载:
https://page.dingtalk.com/wow/z/dingtalk/simple/ddhomedownload#/
向日葵远控
官网下载:
https://sunlogin.oray.com/download/linux?type=personal
FinalShell
http://www.hostbuf.com/t/1059.html
一键安装脚本:
rm -f finalshell_install_linux.sh ;wget www.hostbuf.com/downloads/finalshell_install_linux.sh;chmod +x finalshell_install_linux.sh;./finalshell_install_linux.sh;
Microsoft To D
https://snapcraft.io/install/microsoft-todo-unofficial/ubuntu#install
sudo snap install microsoft-todo-unofficial
Google 输入法
同样,Rime输入法也不错,但是配置起来很麻烦。
先安装fcitx
sudo apt install fcitx
之后,使用im-config来配置,将系统默认的ibus改为fcitx,并重启。
sudo apt install fcitx-googlepinyin
需注意,第一个原本的输入法需要保留,否则用shift切换英文会出现问题。
Anaconda
直接官网下载:
https://www.anaconda.com/download
下载完成后,sudo chmod +x ./run,并运行./run文件进行安装。
安装完成后,在~/.bashrc文件中最后一行,加入export PATH=/home/funnywii/anaconda3/bin:$PATH 也就是你安装 anaconda 的路径,之后source ~/.bashrc
要注意,最新版(2023.11)版本的 anaconda,取消了 anaconda activate命令。激活环境要使用 source activate [env]命令。
环境配置
C++
安装GNU编译器和GDB调试器:
sudo apt-get install build-essential gdb
Python
Ubuntu 20.04自带Python 3.8
OpenCV
https://funnywii.com/archives/opencv入门笔记-opencv460安装和配置ubuntu20044lts
PCL
https://funnywii.com/archives/pcl入门笔记-pcl1130的安装和配置ubuntu
Ros Noetic
https://mp.weixin.qq.com/s?__biz=MzU1NjEwMTY0Mw==&mid=2247562322&idx=1&sn=b8d6d08a2f55bae4dbb532ede6e3d314&chksm=fbc98d36ccbe042000b03ba0ba9ff31c3bd8d97c8c2926bcb55e6d6dc3b9dc702d7609c968dd&scene=27
已经介绍的很详细,基本所有可能遇到的问题都提及到了。
Ros2 Foxy
先添加ros2的仓库
sudo apt update && sudo apt install curl gnupg2 lsb-release
sudo curl -sSL https://raw.githubusercontent.com/ros/rosdistro/master/ros.key  -o /usr/share/keyrings/ros-archive-keyring.gpg
echo "deb [arch=$(dpkg --print-architecture) signed-by=/usr/share/keyrings/ros-archive-keyring.gpg] http://packages.ros.org/ros2/ubuntu $(lsb_release -cs) main" | sudo tee /etc/apt/sources.list.d/ros2.list > /dev/null
然后在 https://github.com/ros2/ros2/releases 下载ros2的安装包,并解压之
mkdir -p ~/ros2_dashing
cd ~/ros2_dashing
tar xf ~/Downloads/ros2-dashing-linux-x86_64.tar.bz2
安装并初始化rosdep,官网中为sudo apt install -y python-rosdep不过Ubuntu 20.04 使用的是python3:
sudo apt update
sudo apt install -y python3-rosdep
sudo rosdep init
rosdep update
一键安装依赖,注意rosdistro foxy此处的版本,很多人安装不成功是因为没有改这里,官网默认为 dashing,而我们的版本是foxy(虽然创建文件夹的时候我也没有注意到,文件夹名称依然是ros2_dashing,不过这个只影响路径)
rosdep install --from-paths ~/ros2_dashing/ros2-linux/share --ignore-src --rosdistro foxy -y --skip-keys "console_bridge fastcdr fastrtps libopensplice67 libopensplice69 osrf_testing_tools_cpp poco_vendor rmw_connext_cpp rosidl_typesupport_connext_c rosidl_typesupport_connext_cpp rti-connext-dds-5.3.1 tinyxml_vendor tinyxml2_vendor urdfdom urdfdom_headers"
安装python3的库
sudo apt install -y libpython3-dev python3-pip
pip3 install -U argcomplete
安装RTI Connext
sudo apt install -q -y \
    rti-connext-dds-5.3.1  # from packages.ros.org/ros2/ubuntu
有人反映 安装到10%-20%的时候,会卡住,不要慌,不是网络问题,需要长按回车,看完agreement后,输入yes即可。
cd /opt/rti.com/rti_connext_dds-5.3.1/resource/scripts && source ./rtisetenv_x64Linux3gcc5.4.0.bash; cd -
之后设置source
. ~/ros2_dashing/ros2-linux/setup.bash
之后便可在两个terminal中分别运行C++和python的talker和listener
ros2 run demo_nodes_cpp talker
ros2 run demo_nodes_py listener
参考文章
[1] https://linux.cn/article-13681-1.html
[2] https://docs.ros.org/en/dashing/Installation/Ubuntu-Install-Binary.html
[3] https://docs.ros.org/en/dashing/Installation/DDS-Implementations.html#ubuntu-linux-binary-install
[4] https://seamatinee.com/2021/09/23/ubuntu-customization/
[5] https://blog.csdn.net/weixin_37926734/article/details/123033286

